Homemade Yogurt
| Ferments and Preserves | Printable Recipe | Return to Little House in the Northwoods |
We use quite a bit of yogurt around here! We use it in cold salad's to replace half, sometimes all of the mayonaise, Kevin loves fruit on the bottom yogurts, and we also use it in place of sour cream. We go through enough that it has been well worth the effort to make it homemade. It's rather quick to prep the yogurt, and then its just a matter of setting a timer and waiting for the cultures to do thier little dance and multiply.
You can use any kind of milk, even half and half, and you can also choose how tangy you would like it. The longer its left to process, the thicker and tangier it gets. We like ours made from whole milk and left to process for 24 hours. With those two elements it tastes remarkably close to Daisy Sour Cream.
To make yogurt, you will want to wash all your utensils and pots or bowls very well. Any bacteria on them will grow along with the good bacteria. That is less than ideal, am I right? You will also need a method to keep your yogurt at 110 degrees so the yogurt can grow the good cultures.
I use my ninja air fryer, because it has a dehydrate setting that allows me to drop the temperature to 110 degrees, and lets me set a timer for 24 hours. Many people use a heavy crock, such as a crock pot insert, and set it in the oven with the light left on. From what I seen, most people will let thier yogurt process for 4 or 5 hours. This is could be adequate. We process for longer so I simply choose to let my ninja oven run for 24 hours. This may be very unnessecary, but I just feel better knowing that temperature is maintained the entire time. I will definelty dive deeper on this and report back!
Prep Time: 15 min
Cook Time: 45 min, maybe less.
Total Time: 1 hr
Serves:Recipe makes as much or as little as you would like. I am writing this recipe for a gallon of milk. You can certainly make less, and use smaller containers.
Ingredients:
- 1 gallon of any dairy milk. We use whole milk.
- 1 small container of desired plain yogurt with active cultures. We use a 5.3 oz. container of Chobani Plain Yogurt.
- A thermometer. You MUST have a thermometer.
- A stock pot for heating your milk to 180 degrees.
- A second pot/crock for processing your yogurt.
- A fine mesh strainer, if you want smooth yogurt. Optional cheesecloth for super silky yogurt.
- A utensil for stirring.
- Wash the stock pot for heating, the utensil for stirring, the fine mesh strainer and whatever heat safe container you will use to ferment the yogurt in with hot soapy water. Rinse good.
- We use another stock pot that fits in the ninja air fryer oven. If using the oven method, you will want something heavy that holds heat like a cast iron roaster with the lid or crock pot insert with lid. Also make sure the surfaces you are using are clean. I like to use a vinegar/water rinse.
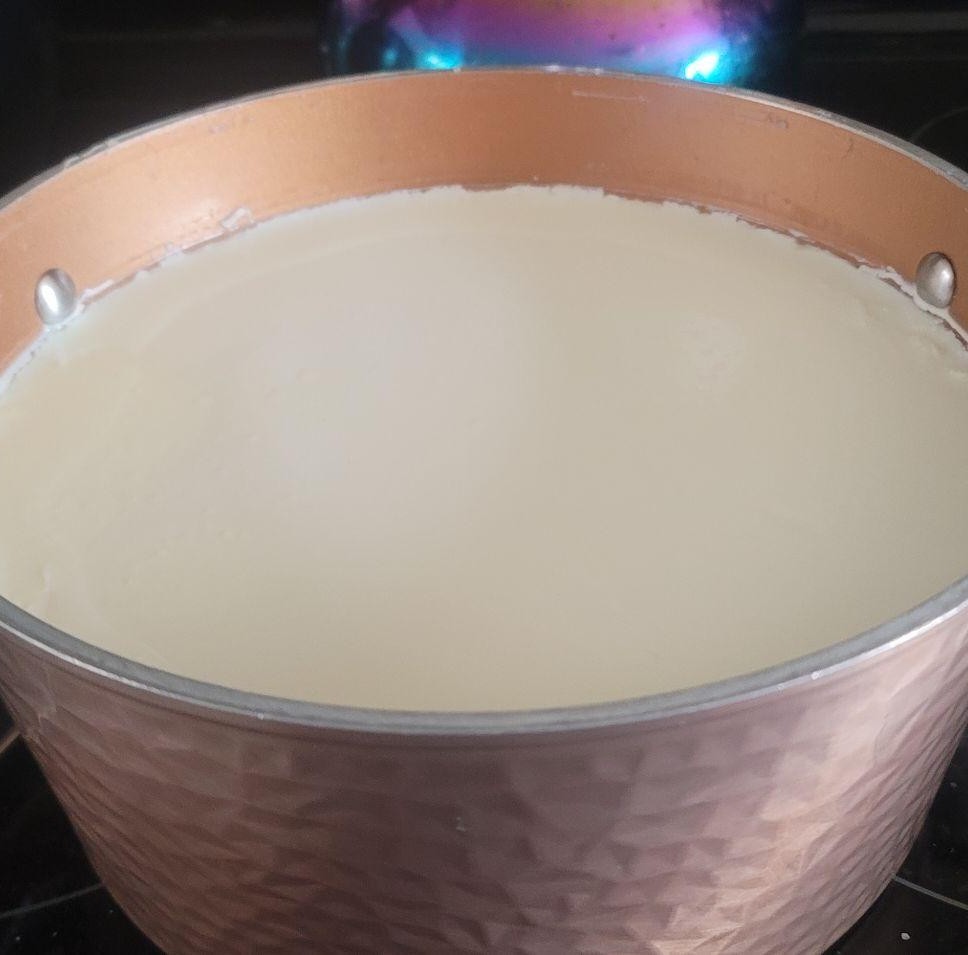
- In the stockpot or saucepan, you will add your milk and set your thermometer so you can see the temperature as you go. You will now heat the milk to 180 degrees. This step breaks down the milk protiens so you have thicker yogurt, as well as kill off any lingering bacteria that might be hanging out.
- As your milk heats, it is important to be scraping the bottom while stirring it. Especially as it gets to the 180 degree mark, as it will scald quite easily. If it does scald, its not the end of the world, you may just want to strain it with cheesecloth to get out any lumpy bits. This happened to me once and I didn't have cheesecloth. The yogurt just had little bits, but it still tasted good. With fruit added, you won't even notice.
- Once your milk hits 180 degrees, remove it from the heat and allow it to cool. Yogurt cultures multiply at 110 degrees, so this is the goal temperature.
- Usually around 120 degrees is when I will strain the milk through the wire mesh lined with the cheesecloth into my clean stockpot/crock pot I will use to process the yogurt. Putting your milk into a cool container will further cool it, so I like to do this when the milk is warmer than 110 degrees yet.
- After you strain the milk into your clean pot, and your milk is at 110 degrees, you can take your container of store bought yogurt, and mix it well with some of your warm milk. This tempers it a bit so its not super cold going into your warm milk. I will use a quart mason jar with a lid to give it a good shake too. Whatever works best for you.
- Mix your yogurt into the pot of warm milk, place the cover on it and then place it into your oven with the light left on. I put mine in the ninja oven set to 110 degrees and 24 hours.
- If you are using your oven, and its your first time making yogurt, I would do this on a day you will be home all day. Maybe check it after 5 hrs and take its temperature. You may or may not want to turn your oven onto warm for a couple minutes and shut it off while you heat your milk back to 110 degrees. This method I have never tried, so I am unsure about how the temp is maintained for longer times. The oven light bulb works well for proofing bread, so it may very well be adequate for yogurt.
- Alternate Methods:In the past, I would use large glass pyrex baking pans with covers in my regular food dehydrator. It could be set to 110 degrees, so this worked perfect. I have also heard of people using thier crock pot wrapped in a warm towel to insulate, and leave it on the counter overnight. This may work well, I simply prefer to have the temperature a steady 110 degrees. Note: A crock pots warm setting is too warm and will kill the yogurt cultures. Alternately, just leaving it on the counter is too cool, unless your house is 110 degrees, of course.
- When your yogurt reaches the desired taste and consistency, you can put a small amount in a container in the fridge to use for next time, rather than buy another yogurt for starting another batch.
- Just a note on timing: 24 hours will give you a yogurt pretty comparable to the plain yogurt you are starting with. If you prefer it less tangy, you can process for a shorter time and it can be thickened with gelatin, or used as a drinkable yogurt.
- A note on thickening and flavoring:When my daughter was young and I did home childcare, I would use a box of flavored jello. I'd use the hot water step to dissolve it and let it cool, and then mix it into the large container of yogurt. I believe I had made at least a half gallon of milk at a time. You can then sweeten it more if desired. You might have to play with how many boxes of jello you need here. I don't recall exactly what I used. If it is on the thin side, it makes great drinkable yogurt.
- If I thickened with jello now, I think I would use plain gelatin, or even freezer jam pectin, and something like Naked Juice and then add fresh fruit puree/chunks. Maybe maple syrup, date syrup or honey to further sweeten, if needed.
- Have fun with it! It is very versatile and can be used in so many creative ways.
Directions:
“ Learn character from trees, values from roots, and change from leaves. ”~Tasneern Harneed |